


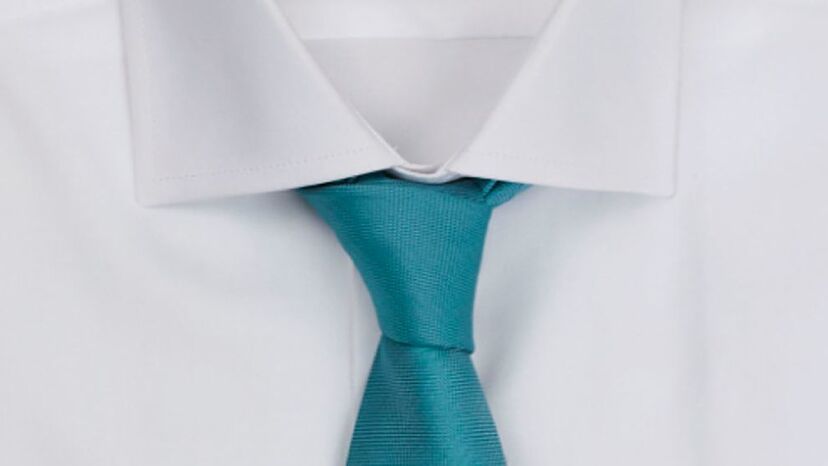
The necktie remains fashionable. A tie is still required for certain occasions, even if you don’t happen to wear one all that frequently. Some mature males don’t know how to tie a tie easy, which is a tragic reality. If they have an important interview that afternoon, they will purchase a clip-on. Males frequently possess a restricted understanding of necktie knots, even if they do know how to tie. There are, however, numerous ways to tie. Particular necktie knots complement particular shirt collars and tie fabric compositions for optimal aesthetic results. We describe three timeless necktie ties that are essential for any gentleman, as well as the situations in which each one should be executed.
I have produced videos for each tie knot as well as a single, massive video that combines them all. To facilitate comprehension of the instructions, the images have been inverted. My right is therefore equivalent to your right while you view the video, and my left is identical to your left. The date of these recordings is 2009. Since they remain edible, I have retained them. You will be able to recall the time when I had a clean visage and no mustache.
Define “tie a tie.”
Tie-tying ability is a fundamental talent for frequent necktie wearers. The procedure entails tying a knot with the tie to fashion and orderly fastening it around the neck. The Windsor knot, alternatively referred to as the Full Windsor or Double Windsor knot, is among the most well-liked. Commence tying a Windsor knot by positioning the broad end of the tie to the right and the narrow end to the left, precisely above the navel. Submerge the broad end beneath the slender end, threading it through the loop that encircles the neck. After that, proceed by passing the broad end through the loop and back up through the front, in a right-to-left direction, before lowering it through the front knot. After modifying the knot to your satisfaction, fasten the narrow end to the back of the broad end through the loop. A few instances of practice will assist you in refining the technique and guaranteeing an elegant appearance with each tie you tie.
How do I tie a tie?
Have you outgrown the clip-on-tie era? With the following instructions, a mirror, a tie that appears pointed, and some perseverance, one can develop into an accomplished practitioner of tying a stylish knot. Multiple choices are at your disposal, including the adaptable Four-in-Hand Knot and the traditional Windsor.

For assistance with putting on a tie for another individual, please refer to this article for instructions written from that particular standpoint.
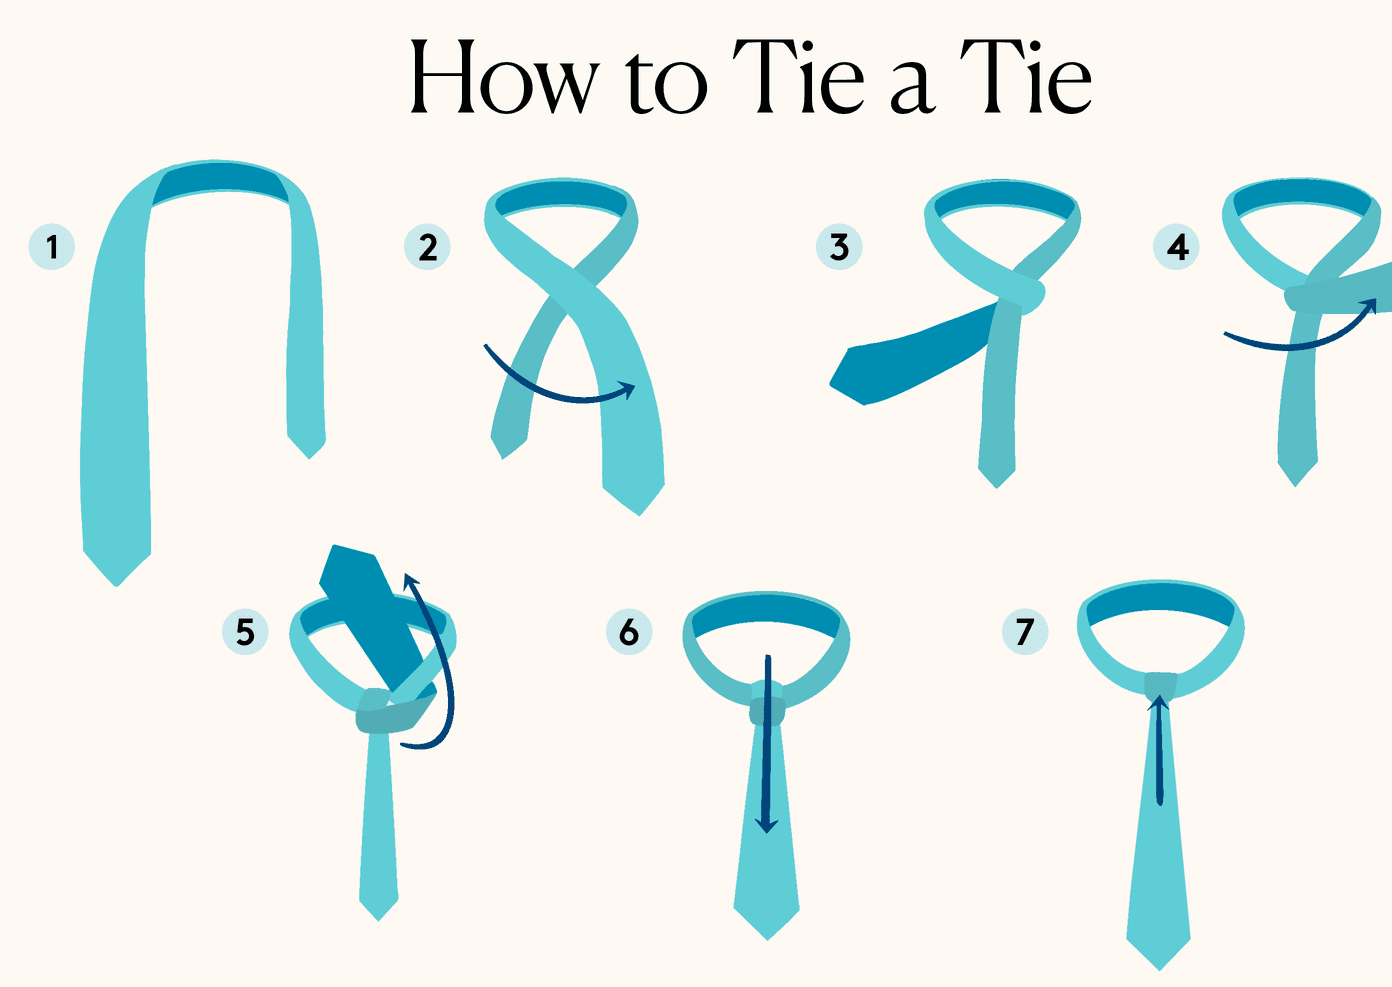
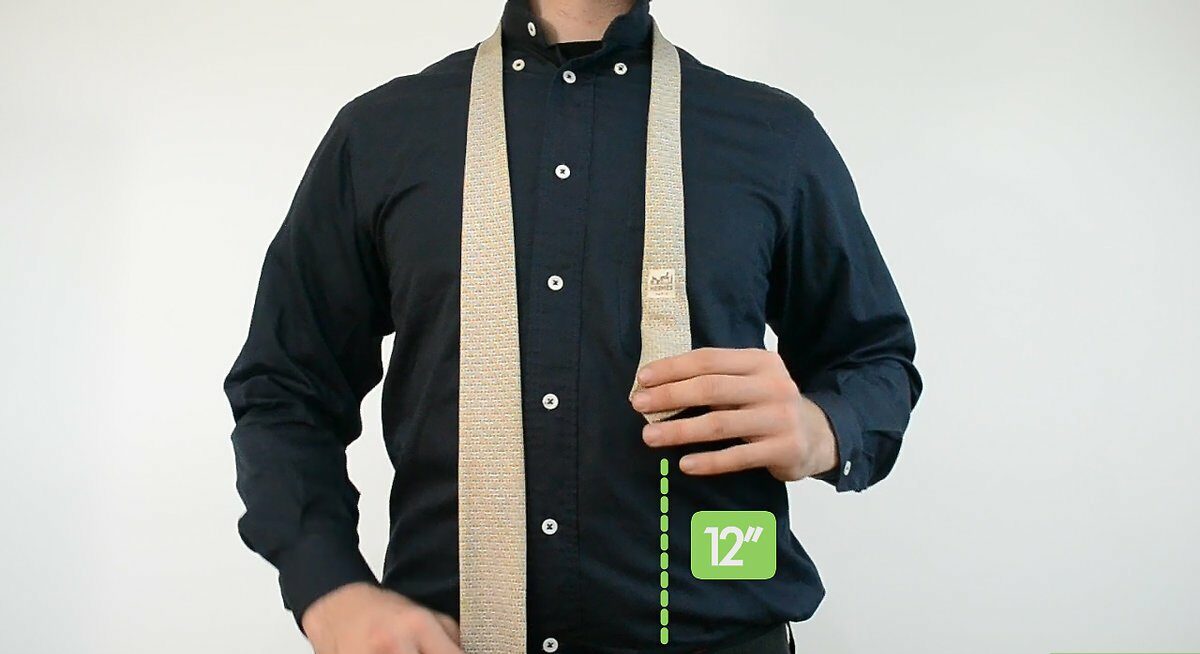
- Circumscribe the tie around your neck. After thoroughly buttoning your shirt and ensuring that the collar is up, drape the tie around your shoulders. Elevate the narrow end of the tie by approximately 12 inches (30 cm) to the left, while suspending the wider end on the right side. Spread collars should be avoided when tying this small, asymmetric knot.
- Overlay the narrow end with the broad end. Place the broad end over the narrow end on the left side of your body. Hold the two sections of fabric together near your neck with your left hand.
- The broad end is looped beneath the narrow end. Release using your right hand. Place it beneath the narrow end, then grasp and drag the broad end to return it to your right side.
- Re-enter the broad end through the loop. Once more, cross it over the narrow end at the location where your left hand is securing the knot. It is important to ensure that the front of the tie is once again facing forward, concealing the crease.
- Utilize the neck loop to thread the broad end upwards. Fold the broad end’s tip under itself and draw the fabric upward via the neck loop.
- Downward thread the wide end through the front knot. A horizontal knot ought to be tied across the front of the tie. While holding this knot with one finger open, insert the broad end with care.
- Secure the tie. To reinforce the tie, grasp the narrow end and slide the front knot upward. Ensure that your tie is properly lengthened and straight, ideally to the point where it reaches the top of your belt fastening. Gently squeeze the sides of the knot to form a dimple immediately beneath it. At the neck, the four-in-hand plait is slightly asymmetrical. This is nothing to fret about; it is normal.
- Insert the narrow tie end through the loop located at the reverse of the wide end.
- As you fold the collar down over your neck, make sure the collar completely encircles the tie.
A perfectly colored tie tied in the appropriate knot can completely transform an ensemble. You may also consider experimenting with alternative tie knots instead of the standard one. In addition to elevating your appearance, it will also bolster your confidence. We have you covered if you are interested in learning more about ties and how to tie one. You will discover everything you need to know about donning ties and how to tie them by continuing to read.
Why Should a Tie Be Embroidered Into Your Attire?
Still uncertain about whether or not to complement your fundamental ensemble with a tie? Listed below are the numerous advantages of incorporating a tie into your ensemble.
By wearing ties, you stand out
- When you wear a tie, especially a hex tie, you will undoubtedly stand out from the crowd. Differentiating yourself from others will attract the attention of the appropriate individuals. If this is precisely what you are looking for, then you ought to begin donning a tie immediately.
Instills Confidence
- Not only will donning a tie distinguish you from others but as more people begin to notice you, it will also bolster your confidence. Wear a tie to a meeting or a date and observe the impact it has on the perceptions of others.
More individuals will respect you
- Many people, including your employers, will respect you more if you wear a tie. By donning a tie, one can convey the impression that supplementary time and effort were invested in one’s preparations. This conveys to them your commitment to your occupation and the time and energy you have invested in self-improvement. Consequently, if you desire greater regard from others, you should incorporate ties into your daily attire.
A necktie imparts a sense of professionalism
- Furthermore, if you desire greater attention in the workplace, you should undoubtedly accessorize with a tie. In addition to distinguishing you from your peers and garnering the admiration of your employers and coworkers, it will also impart a professional appearance.
Your face is enhanced by donning a tie
- Desire to command focus on your countenance? A tie is an article of clothing that draws attention to your face and compels individuals to observe your facial expressions. An individual’s appeal is enhanced and greater attention is garnered when donning a fashionable tie, such as a textile.
Provides contrast to an ensemble
- Sick of donning the same old, uninteresting attire? Why not add some visual interest to them by donning a tie? Regardless of the garments you choose, a tie will completely transform the appearance of your ensemble by providing the appropriate contrast. It is possible to enhance the visual appeal and interest of an ensemble by choosing ties in various hues.
You Can Produce Diverse Appearances
- The repetition of wearing the same old clothing can become tedious at times. Everyone desires a transformation in appearance. This modification can now be readily implemented with a tie! Diverse types of ensembles can be achieved by utilizing distinct tie knots and toe hues.
Women Admire Gentlemen Dressed in Ties
- Would you like to attract a lady that you like? You should then undoubtedly obtain a tie. Simply put, women adore males in ties. Thus, immediately proceed to the store to purchase a tie.

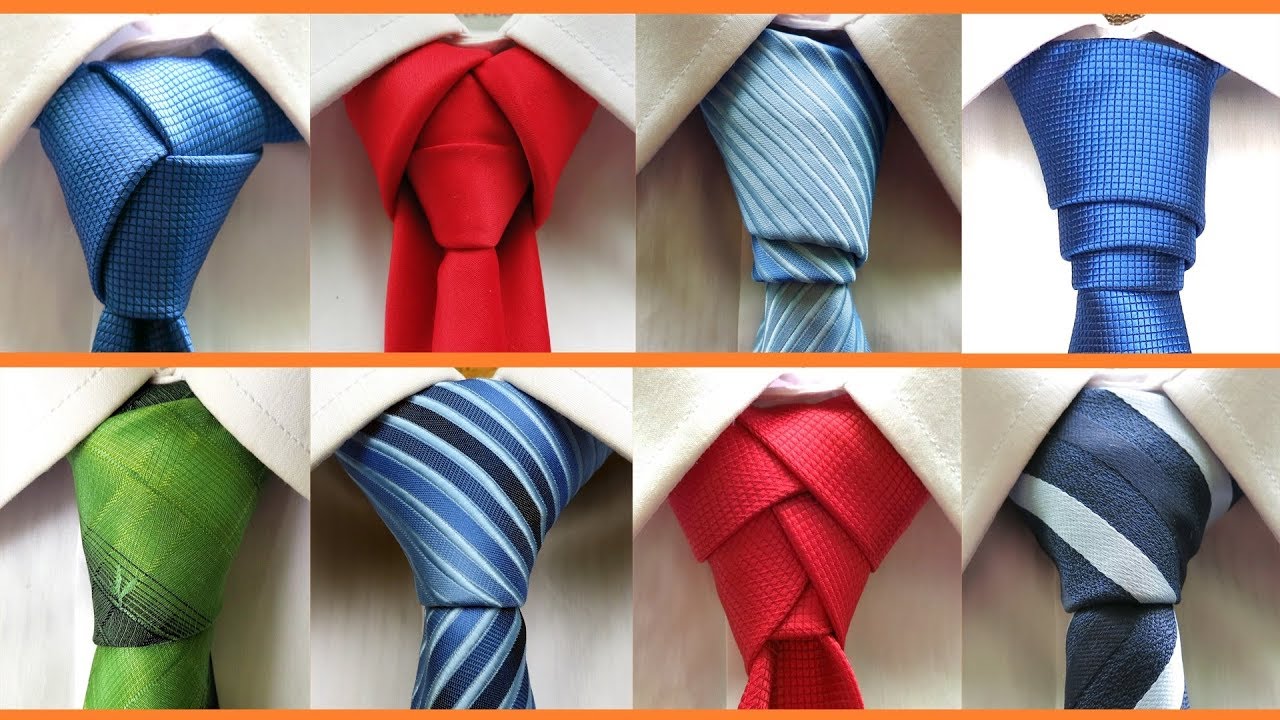
Variations in Necktie Knots
Consider some of the following alternative necktie knot configurations to enhance the sophistication of your ensemble.
- KNT Four-in-Hand: While this timeless knot is considered effortless to learn and suitable for nearly every event, certain fashion websites advise opting for a Windsor half-or-full knot for the most formal occasions.
- Complete Windsor Knot: The full Windsor, an additional traditional necktie knot, produces a more substantial knot that may offer a slight sense of equilibrium to individuals who prefer to wear neckties that are on the larger side. A few additional loops are added to the broad end of the tie to form a more substantial necktie knot.
- Windsor Half-Knot: This knot, which is a diminutive rendition of the Windsor knot, consists of a few additional coils of the broader portion of the tie to fashion a secure and stable knot.
- Kelvin Tie: This more recent knot design is most effective when executed with a broad tie, as a slender tie may cause the knot to appear too small.
- Krott, Pratt: This comparatively uncomplicated knot is ideal for taller gentlemen, as it yields a small surplus of tie material at the conclusion. Additionally, it is tied with the seam side visible, yet concludes with an impeccably refined knot. P.S. This is also referred to as the Shelby knot after a newscaster in the 1970s popularized the style.
- The Triune Knot: The name of this innovative necktie knot originates from its three front-facing components. It is a fantastic knot for an individual who desires something unique and noteworthy and is prepared to invest additional effort in crafting it. (To construct this intricate knot, the thin portion of the tie must be looped several times in different directions.)
- Eldredge Cord Knot: This intricate knot featuring a braid-like element is ideal for those who are proficient in basic knots but desire a touch of added sophistication. Additionally, it is recommended to wear it with a tie in a solid color, as pairing it with flamboyant patterns may lead to an unbalanced appearance.
An Overview of the Full Windsor Knot
The Windsor knot, which has a refined triangular form, is an appropriate choice for social gatherings, job interviews, and presentations. Due to its expansive silhouette, this tie complements a spread-collar shirt most effectively. While it may seem intricate, mastering the complete Windsor knot can be achieved with relative ease.
Complete Windsor Knot Procedure
- Raise the shirt collar and drape the tie around the neck so that the broad end is on the right side and extends approximately 12 inches below the narrow end to initiate the full Windsor knot.
- Overlay the narrow portion of the tie with the wide portion.
- Pull the wide end down after threading it through the neck orifice.
- While with the incorrect side facing out, pass the broad end underneath and to the right of the narrow portion.
- Cross the broad section over and to the left of the narrow section while maintaining the correct side facing outward.
- Thread the broad end through the neck aperture.
- While lowering it, thread it through the front loop.
- While grasping the suspended components with one hand, deliciously thread the knot towards the collar using the other until it becomes tight, after which lower the collar.
Determining the Half Windsor Knot
You can have a lot of options when getting dressed if you know how to tie a tie easy. Variations only serve to expand the potential even further. A classic presentation, the half Windsor knot features a triangular and symmetrical configuration. It combines well with any formal shirt and works best with wider, medium-weight ties due to its diminutive size in comparison to the full Windsor. The half Windsor knot can be effortlessly created by following a few straightforward instructions.
Similar to the complete Windsor knot, commence the procedure by erecting the shirt collar. Position the broad end of the tie on the right side of the neck, approximately 12 inches below the narrow end, and tie it around the neck.

Steps to a Half Windsor Knot
- Connect the broad section to the narrow section.
- Behind the narrow section, cross the wide section so that the incorrect side is facing out.
- Raise and shift the broad end to the left.
- Pull it through the neck orifice until the reverse side is facing to the right.
- From right to left, pass the broad end over the narrow portion while keeping the correct side facing upward.
- Once more, thread the broad end through the neck loop.
- Insert it through the eyelet located at the front of the collar when lowering it.
- Sliding the knot upward while grasping the tails with the other hand will allow for the necessary adjustments.
- To finish the ensemble, lower the neckline of the blouse.
A Few Tips Regarding Tie Wearing
Numerous other aspects warrant consideration in addition to learning how to tie a tie easy. Therefore, if you are interested in tie-wearing advice, continue reading.
Contrast your tie and shirt
- To make a favorable impression on others, it is advisable to coordinate the color of your tie with that of your blouse. Avoid selecting tie colors that are incompatible with your outfits. This will only cause others to doubt your fashion sensibility rather than admire it. Therefore, ensure that the color of your tie contrasts with that of your shirt.
Select The Finest Tie Colors
- When browsing for ties, you should consistently choose the most attractive hues. Because it will serve as a reflection of your entire persona, the hue of your ties should be chosen with considerable care. Therefore, avoid selecting tie colors at random. Choose the ones that are of the highest quality.
Coordinate the collar of your shirt and tie
- An additional practical piece of advice that we are about to impart is to coordinate the color of your ties with the neckline of your shirts. This is an excellent method to contrast your ties and it also appears quite refined. Additionally, selecting the appropriate knot style following the collar of the garment one is donning is of utmost significance.
Choose the Ideal Tie Knots for yourself
- Undoubtedly, the hue of your tie significantly influences how positively others perceive you. However, tie knots are equally as vital. You ought to be aware that various tie configurations complement distinct blouse styles. While some tie knots are appropriate for formal events, others are more casual. You should therefore select the appropriate tie knot for the occasion and attire you are donning.
Avoid acquiring wrinkles on your tie
- Having wrinkles on one’s tie is strongly discouraged. Thus, if your tie becomes creased, you must eliminate the wrinkles immediately. While wrinkles are unavoidable, they make an extremely poor impression, particularly if the tie is constructed from weighty materials. Attempt to circumvent them to the greatest extent possible.
Ties undeniably have a significant impact on the way one is perceived. Hence, it is advisable to incorporate tie knots into our daily routines and acquire the ability to tie various varieties to incorporate variety into our fashion sense.
In closing,
Proficiency in the art of tie-tying is an invaluable competency for individuals who don neckties, be it in business environments or formal occasions. Although there are numerous techniques for securing a tie, it is possible to save time and aggravation by identifying the simplest and most effective one. You can efficiently tie a knot that exudes professionalism and refinement by adhering to a straightforward and uncomplicated series of steps. Developing a basic understanding of how to tie can enhance the efficiency of one’s morning regimen and elevate one’s self-assurance when it comes to elegant attire, regardless of prior tie-wearing experience.

FAQs:
How should one most effortlessly tie a tie easy?
A: Sometimes, the four-in-hand knot is the simplest method for many individuals to tie. This knot requires fewer stages and is easy to master in comparison to more intricate knots such as the Windsor or Half-Windsor. It yields a knot that is marginally asymmetrical but functional for the majority of situations.
How can I quickly and effortlessly learn to tie?
A. Video tutorials or plain, concise instructions can facilitate the process of learning how to tie. Mastering the technique requires consistent practice, so be patient and deliberate. Performing in front of a mirror could be beneficial if it allows you to assess your technique and make necessary adjustments.
Do any particular accessories or instruments facilitate the process of tying a tie?
A: Yes, numerous tools and accessories, including tie clips, tie racks, and tie-tying aides, are available to assist with tie-tying. These implements can assist in maintaining the tie’s position during the knotting process and guarantee a refined and polished appearance.
Can distinct tie knots be employed for various occasions?
Furthermore, tie knots can be selected according to individual design preferences and the nature of the event. You may choose a larger, more symmetrical knot, such as the Windsor or Half-Windsor, for formal occasions. For ordinary or more casual attire, a smaller knot, such as the four-in-hand, might be more suitable. Determine which knots function most effectively through experimentation.